8 tips from the Flower Flow class
I am so excited because my new class Flower Flow is finally ready! Class starts next week, and today I have plenty of sneak peeks and fun tips to share with you, straight from the classroom. But first, here is the link to find out more:

Now, let’s take a look inside the classroom!
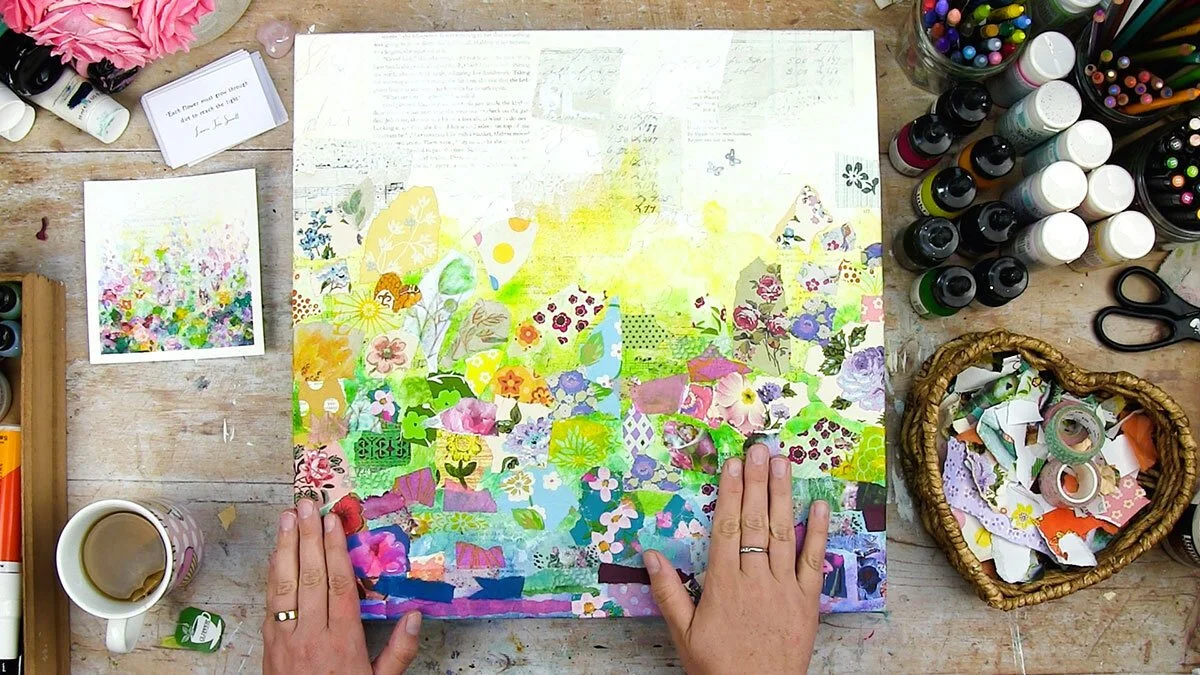
Back in May, after filming the first project (pictured above), I had every intention of sharing my progress here on the blog each week, with sneak peeks of all the lessons. Well, that might have been just a bit unrealistic: creating an online class is a big undertaking!
Marketing experts might disagree, but I’d rather focus on creating the best class for my students, rather than being all over the web talking about it. I’ve still managed to share my progress on Instagram and in my newsletter along the way, and I’m so grateful for the support of all my followers and subscribers: thank you thank you thank you!
Now that William and I are in the final stretch of editing the videos, I thought I’d share some snapshots and a few creative tips taken directly from the class! How about one for each project?
There are two projects per lesson: one mini series to warm up and get inspired + one bigger painting. That’s 8 projects altogether (and over 20 finished artworks, not including the bonuses!). Let’s start at the beginning, shall we?
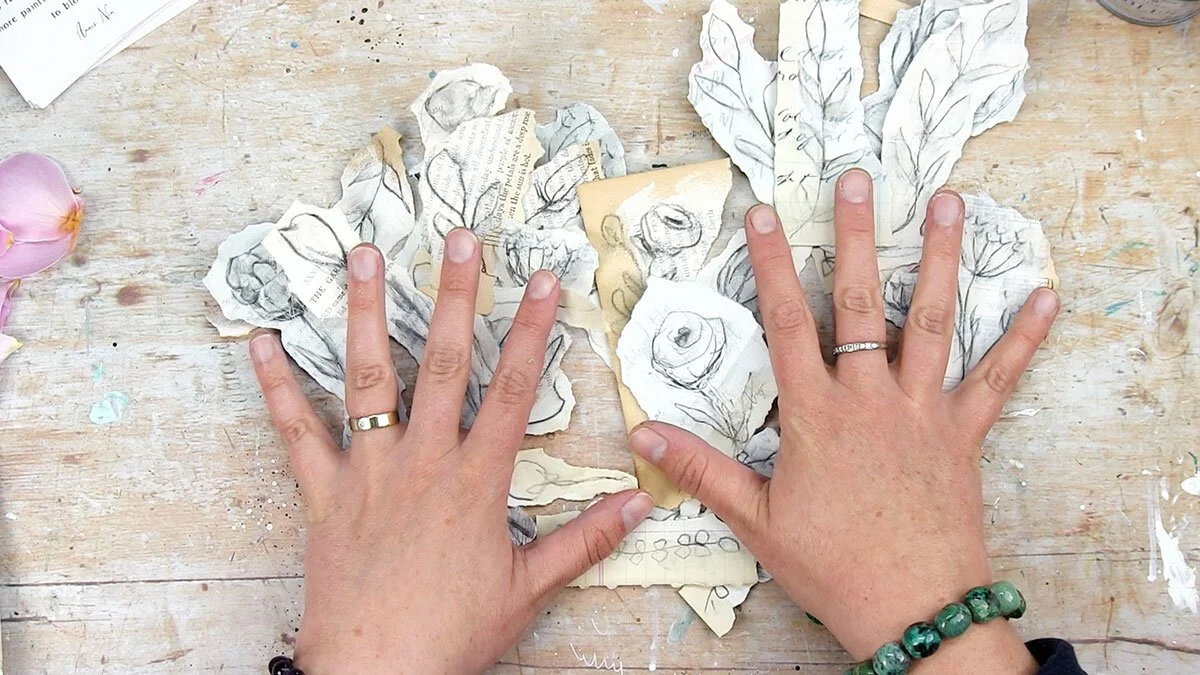
lesson 1: shabby blooms
tip #1: your creative space
What better place to start than letting go of perfectionism, loosening up and embracing the beauty of imperfection? Let’s warm-up with a series of happy, slightly grungy little posies!
There are so many tips I could share just from this first project, like creating more material than you will end up needing (I like to have plenty left for my art journal!). But maybe the most important is one I share in all my classes: your art starts with your creative space! Take the time to make your space inviting, nurturing and inspiring: it will ripple out into the art you make.
The week when I filmed this, we had the first roses and strawberries, and William made the yummiest jam. There was such sweetness in the air, it had to inspire my little series! So at one point in this lesson, we’re having tea and scones in the studio… I hope you will join me!


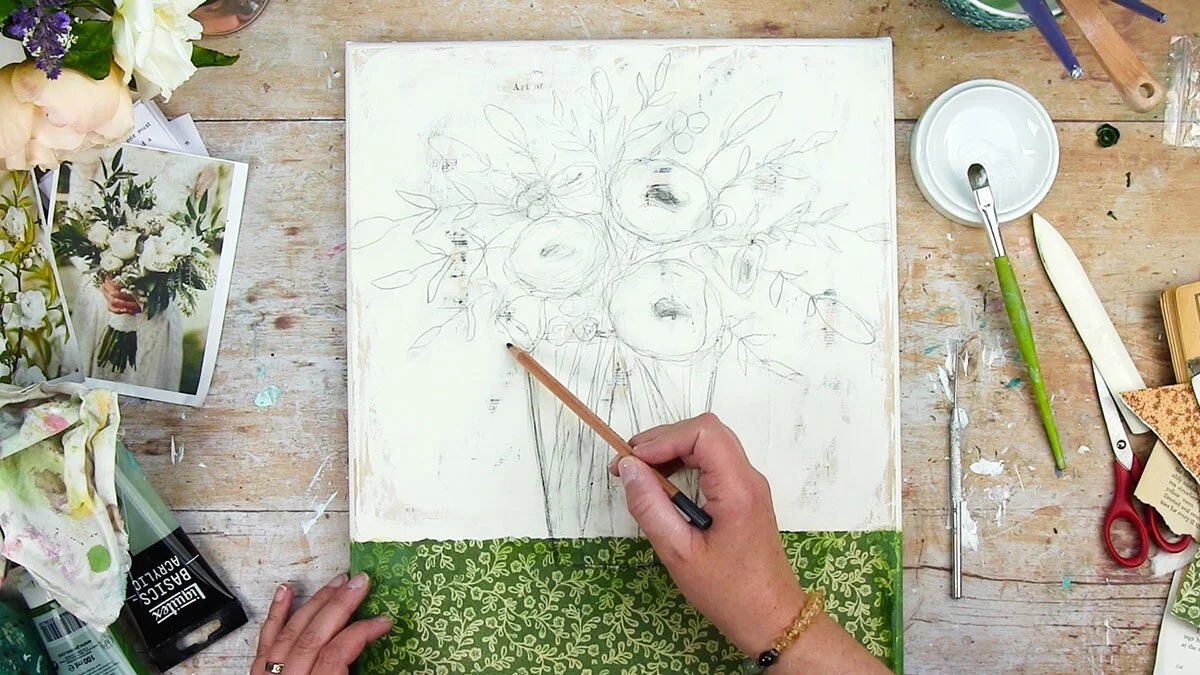
tip #2: embrace imperfection
After our little series, we will move on to the canvas and embrace simplicity with a sweet bouquet. Now, I know that for some of you, drawing flowers can feel a little intimidating… or a lot! The truth is, I am too: I mean, if I were trying to paint true-to-life, realistic flowers, I would get so frustrated. In fact, I wouldn’t even try. Because first, there is no way I can even come close to the beauty of mama Nature. And second, it just doesn’t feel very fun!
So please do not think you need any “drawing skills” for this. The trick is to fully, deliberately embrace imperfection: use your non-dominant hand, paint outside of the lines and draw the flowers that come naturally to you, simple, imaginary, the kind you would doodle in the margins of a note-book. Smudge them with your fingers and see what happens!
And if a canvas feels too scary, do this in your art journal or on a sheet of paper. Even better, practice on several sheets! Your blooms will turn out perfectly imperfect.


lesson 2: over the rainbow
tip #3: try things out
In this lesson, we put on our impressionist glasses and play with the rainbow! You’re invited to go on a scavenger hunt for every colorful supply you could find (borrow those crayons from your kids!), and see flowers as simple dots of color: this is so forgiving!
One of the reasons why I love to create a mini series, before moving on to a bigger project, is that it allows me to try things out, play and experiment a lot more freely than on a “real” canvas. When you approach these little paintings as studies, there’s no pressure! If they turn out pretty, that’s great, but if you end up not liking one or several of them, that’s good too, because finding out what you like and don’t like is super important to develop a unique style of your own.
For instance, in this project, we’re going to try a different composition on each little substrate, see where it takes us, then take our favorite from the lot and use it as our template for a much bigger piece: this way we’re not starting from scratch, which makes things a lot easier and more fun!


tip #4: do it your way!
Layers layers layers... They are my absolute favorite process in mixed media art! Fun and forgiving, because you can always add, remove, cover up, play and experiment... Deep and meaningful because you can include words and hide little secrets. I find both the process and the results completely magical and delightful. Everything is allowed, anything is possible! And this means you can do things your way.
In both projects of this lesson, I’m showing you plenty of different techniques, different layers. From the series to the main project, we’re not necessarily going to do them in the same order, because what matters is to do what works best for you, in the moment. If you want to add more layers to the mix, go ahead! If you want to skip some of the steps, you are more than welcome! It’s completely up to you.
At the end of each lesson in Flower Flow, I’m sharing plenty of fun finishing touches. To me, this is a hugely important part of the process, because this last layer can really bring a painting together, make it feel finished and above all, make it feel truly YOURS. Finding your own personal blend of finishing touches, that you will use again and again in your art, is a great way to build your own unique, recognizable style.


lesson 3: a little wild
tip #5: make it pop!
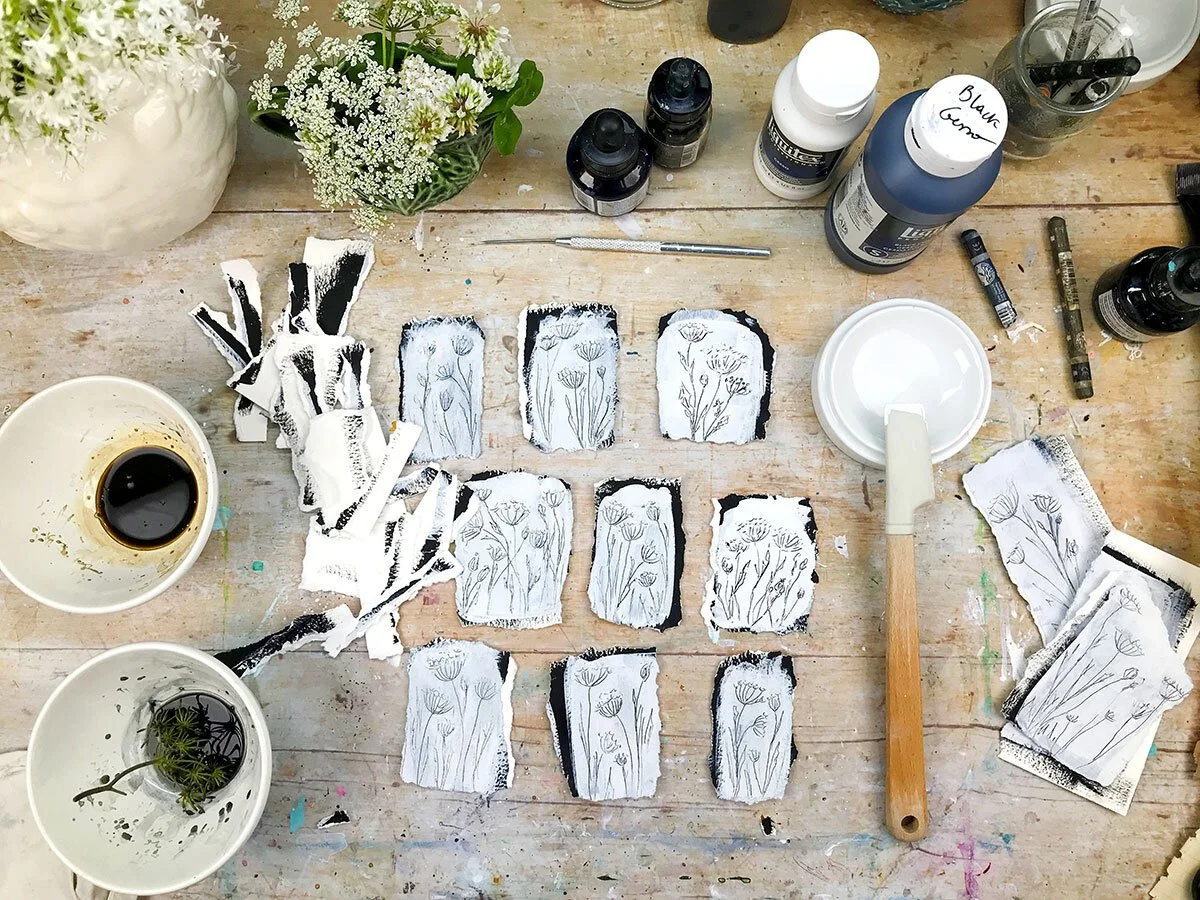
Let’s create something completely different, drawing inspiration from wildflowers, their untamed beauty, movement and graphic lines. We will even use flowers as painting tools!
In this lesson we’re exploring texture and contrast, two key element of art, and especially mixed media. Combining paper, fibers and other yummy materials, we will start with a fun warmup in black and white, and turn it into mini collage artworks. Then we will keep going on this wildflower ride with a deep and beautifully textured painting!
Do you know that feeling, when a painting doesn’t feel finished and just a little bland, a little dull? That’s so frustrating, right? Students often ask me about this, and most of the time, the answer is… contrast! Value contrast (light/dark) is the most obvious and often the most useful to fix this kind of problem. In my art, you will always find some pure white, and at least a little bit of pure black (sometimes another very dark neutral).
But there are also plenty of other kinds of contrast: cool/warm, smooth/rugged, straight/curvy, light/heavy… They are key to making a painting pop, making it interesting and yummy! We explore them all in this lesson.


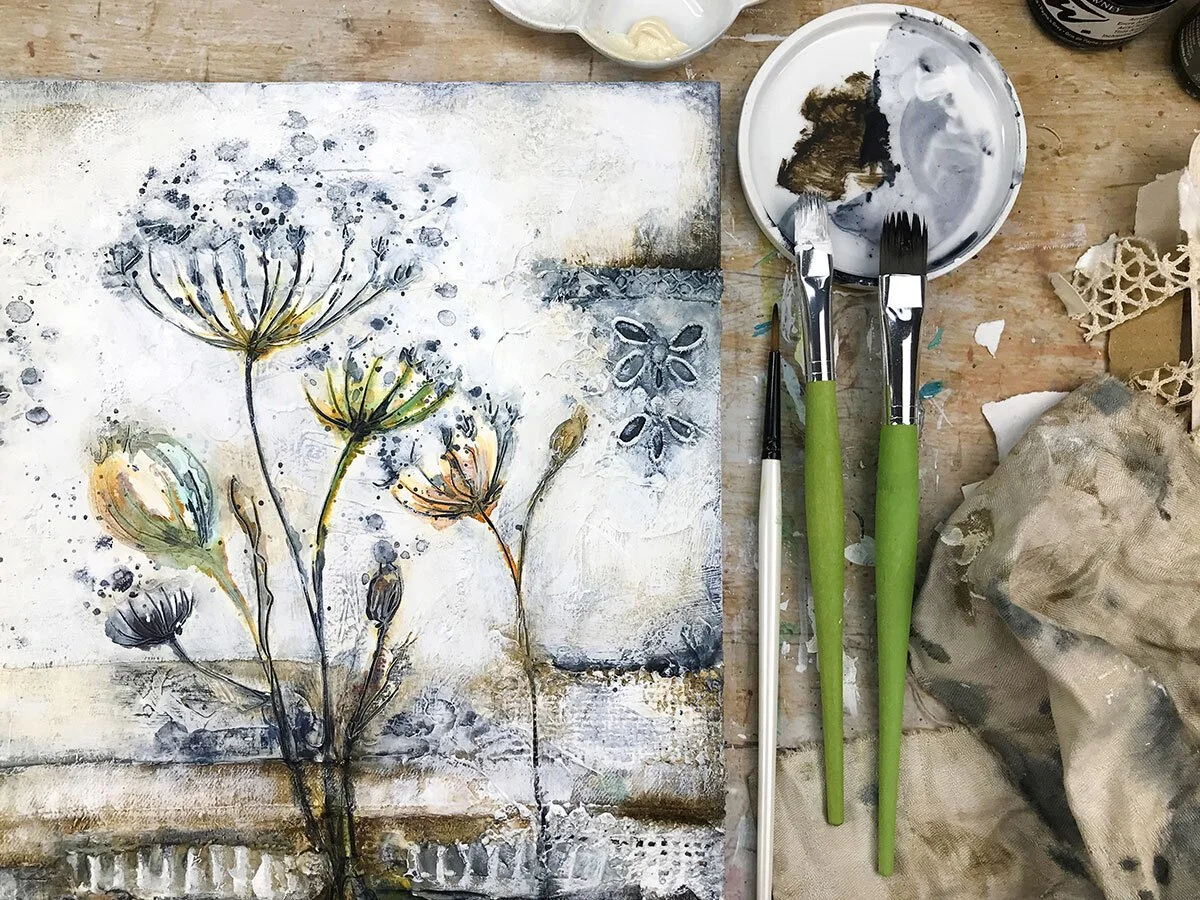
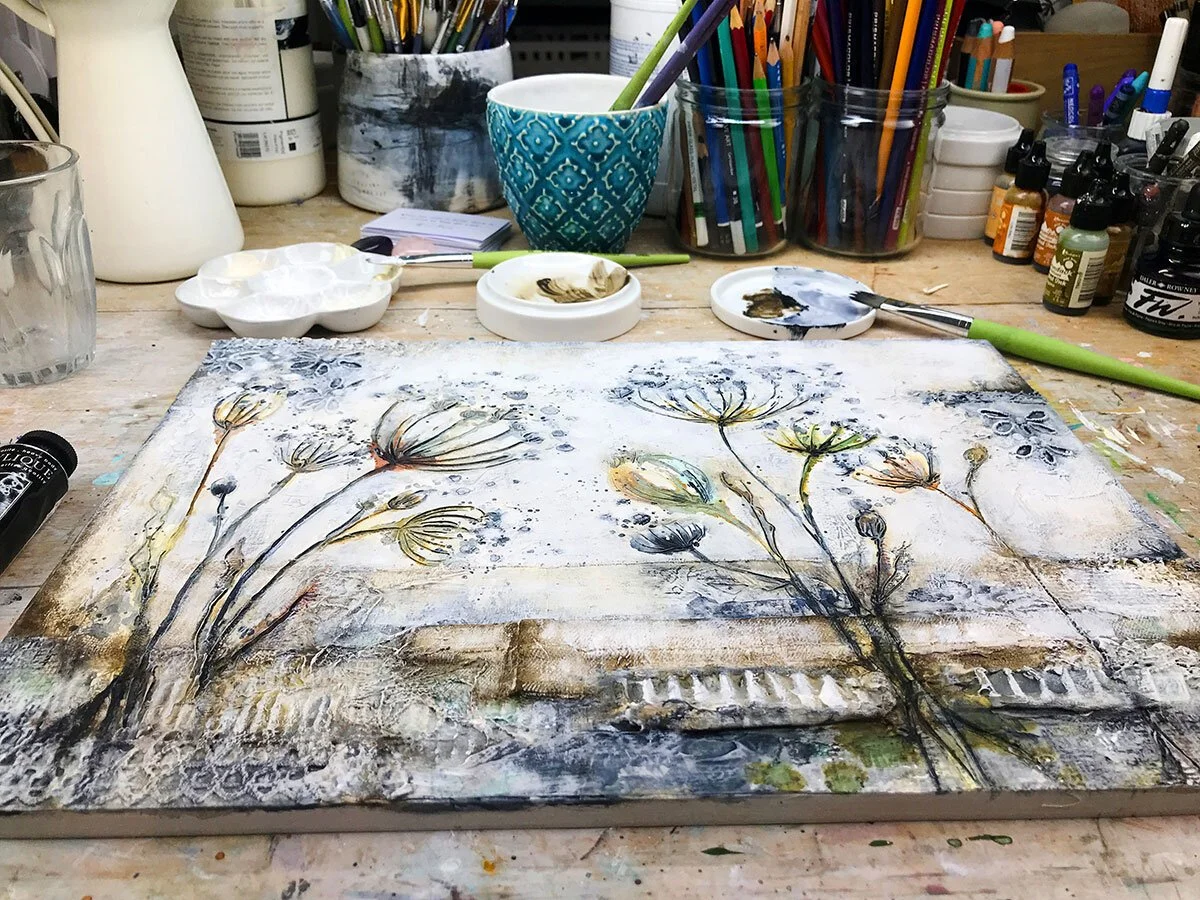
tip#6: know when to stop
For many artists, it can be a challenge to know when a painting is finished, and to stop before you start overworking it. To me, this is all about paying attention to the way you feel as you paint, and to the relationship that's weaving itself between you and the art, little by little. It requires listening to the whispers of your artist soul, and following them... which does take practice!
The key is to take your time, especially around the end of the process, or when you’ve just created something you’re really excited about. Slow down, take a step back, take a moment to breathe. Often at the end of a video, you will hear me say "OK, now I’m going to take a good break” or go make myself a cup of tea or take a walk in the garden… taking a break is a very important part of the creative process!
In several projects of Flower Flow, you might reach a stage where you feel your painting is done, even if the lesson is not! And if this happens, I will encourage you to stop: if it feels finished to you, if you’re happy with it, don’t keep going just because I do! This is the case with this wildflower painting:


lesson 4: dare to bloom!
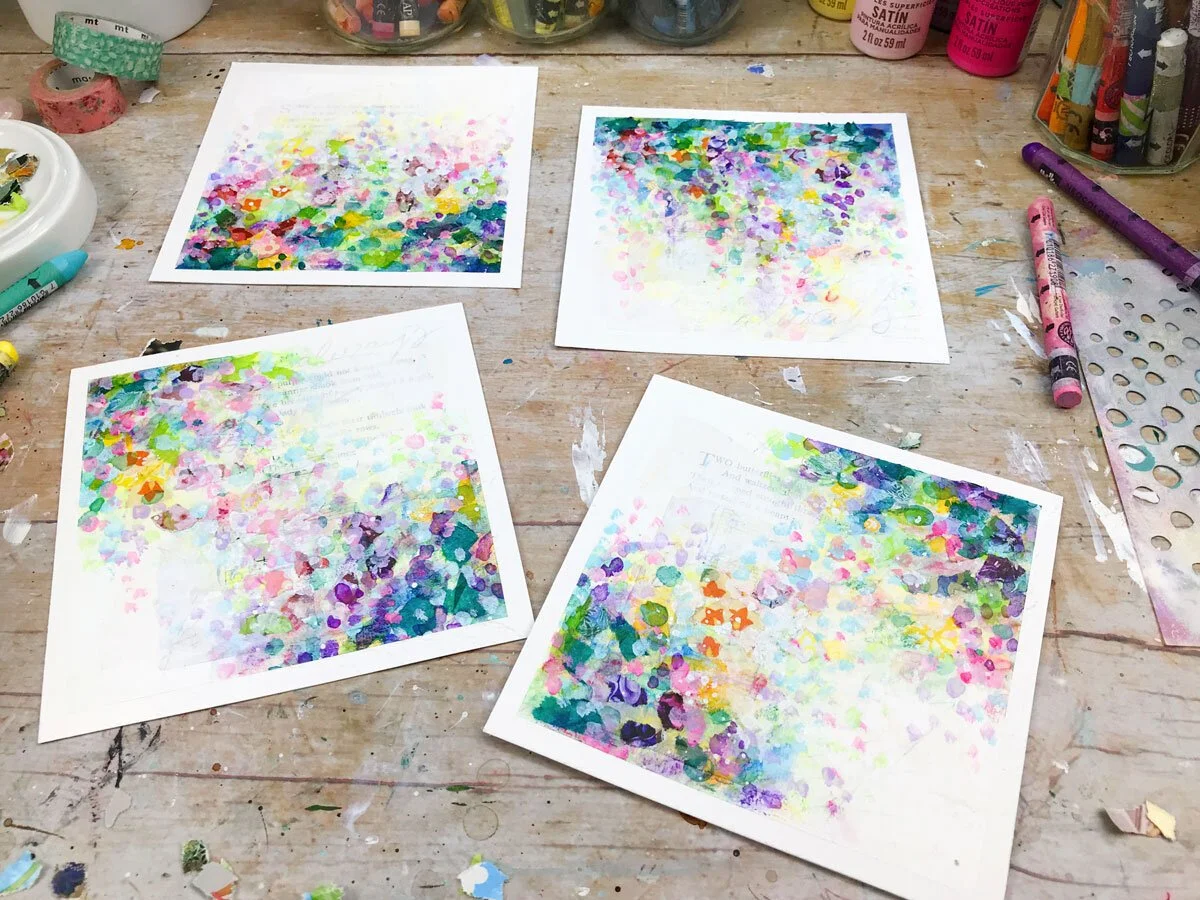
tip#7: don’t wait
What would it take for you to really grow and bloom creatively? Flowers have a way of blossoming again and again, delicate, joyful and colorful no matter what: in a crack of the pavement, or right after a storm. We may not always have the perfect space, the quiet time, the skills or the right art supplies. We may not feel inspired or be “in the mood”, but what if we dared to bloom and create anyway, right now, right where we are planted?
“Don’t wait” is one of the most important tips I could ever give you. In fact, you might want to write it in big bold letters and stick it somewhere you will see it everyday, especially when you’re NOT creating (and possibly procrastinating!): stick it to your fridge, to your bathroom mirror, in your car, somewhere in your bedroom where you can see it as soon as you wake up… don’t wait! Go make your art now!
For this project, we will find inspiration in art journaling: we're going to start by filling a page with words, taking a moment to reflect on what makes us bloom. Then we will add color and flowers, and cut the page into mini paintings, that we can keep working on individually:


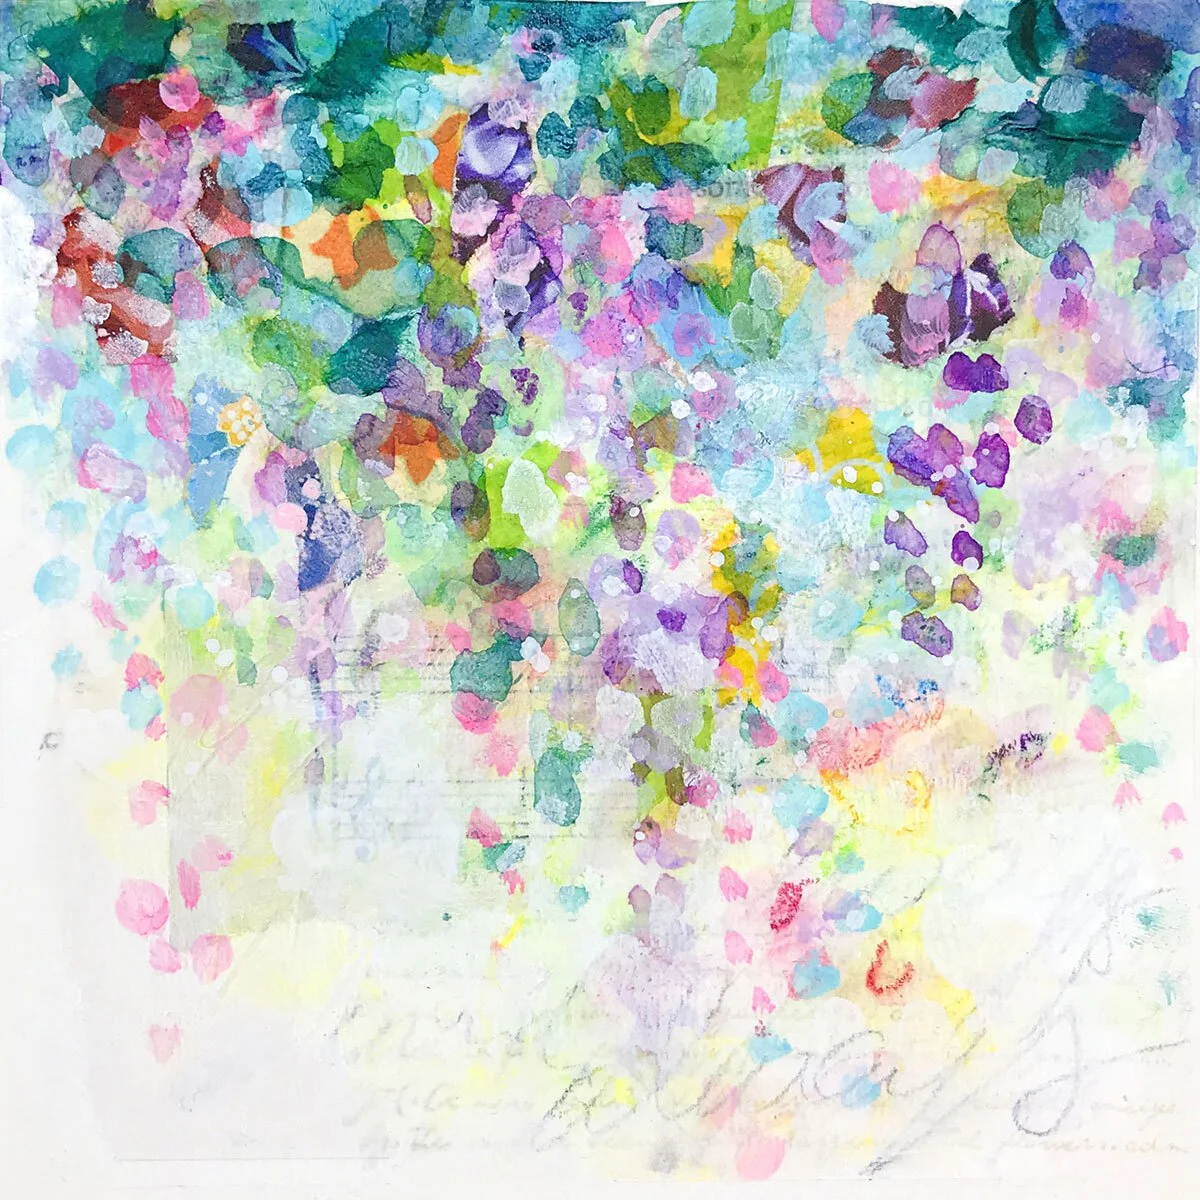
tip #8: do what you love
For our final project of the class, we will create a flowy floral that combines everything we’ve explored in the class: color, texture, light, lines, contrast, and above all, the joy and playfulness of mixed media art! This is my invitation: bring to this painting everything that you love, your favorite flowers, a favorite color combination, maybe a favorite symbol, a few encouraging words that resonate deep in your heart.
All along the class (and for that matter, in any class you take with me or any other teacher), never forget that this is about YOU and YOUR art. Not mine, not anybody else’s. Anything you see that feels fun and rings true, practice and make it yours! Any idea, technique or supply that doesn’t feel good or inspiring, just let it go. Mix things up, switch the layers, try something different! This is how your art, and your soul, will grow and bloom.


Tell me, which of these eight tips resonates with you the most? What little shift, in your creative practice or in your artist mindset, could make a real, positive difference for you? Tell me in a comment at the end of this blog, then go do it!

Flowers may be small and ephemeral, but they are also powerful and meaningful: they are messengers of hope, love, joy and compassion, they express beauty and our connection to nature. I think today more than ever, our world is in deep need of all of these things, and that’s the real “why” behind this class. I cannot wait to see all the beautiful and unique paintings that are about to bloom all over the world!
Creating Flower Flow has been a delightful and exciting journey, but not half as exciting as the real adventure that’s about to begin.