Art studio makeover!

welcome! This is the view as you walk in through the door
welcome to my new creative home!
I am so excited to invite you into my new studio space! Well, it's not "new" per se: it's still the same room, with a lot of the same furniture, the same art supplies... but OMG, how different it feels to me now! I gave the room a complete makeover and I’m so excited to share all about it with you today, including plenty of useful tips and special little details that I hope will give you some ideas for your own artsy haven.
In this first post, I’m giving you a tour of the different working stations, and in a second part I will tell you all about my favorite storage solutions for art supplies!
For now, let’s explore:
• the art journaling corner
• the main painting space
• the dusty corner
• the “take a look back” spot
• the filming area
• the “take a break” nook
• the easel
• the office
• the “behind-the-door” bonus space
my mess while we were moving things around
Mindful-soulful planning
We moved into our beautiful old home, a French farmhouse from 1901, just two years ago, so that’s when I first settled into my current art space (click here if you wish to see the “before tour”). To me, the best creative space needs to be both functional and inspiring. Mine already was, BUT there were some things that just didn’t work for me very well, and it was time for a change.
So before I got started, I really took the time to assess what I needed. Which does NOT mean going crazy shopping and Pinteresting (at least not at first!). What I mean is that I took the time to FEEL what was not feeling right in that space for me. What were the things that made me get stuck or resistant? What parts of the studio did I rarely use? Were did messy piles of “stuff” accumulate again and again? What did the space (and I) need, to breathe more and help energy flow?
Here are the 3 things I decided I most needed to focus on:
Create different work stations for different purposes including, most importantly, a separate space for filming my classes, and a dedicated art journaling table.
Make the space feel like home, so that as soon as I walk in, I will feel invited to create. Make it a space to dream, relax and play, not just a place to work.
Light: bring light to the back of the room, which used to be darker than the rest.

I love that This reminder to breathe is one of the first things I see when I walk in.
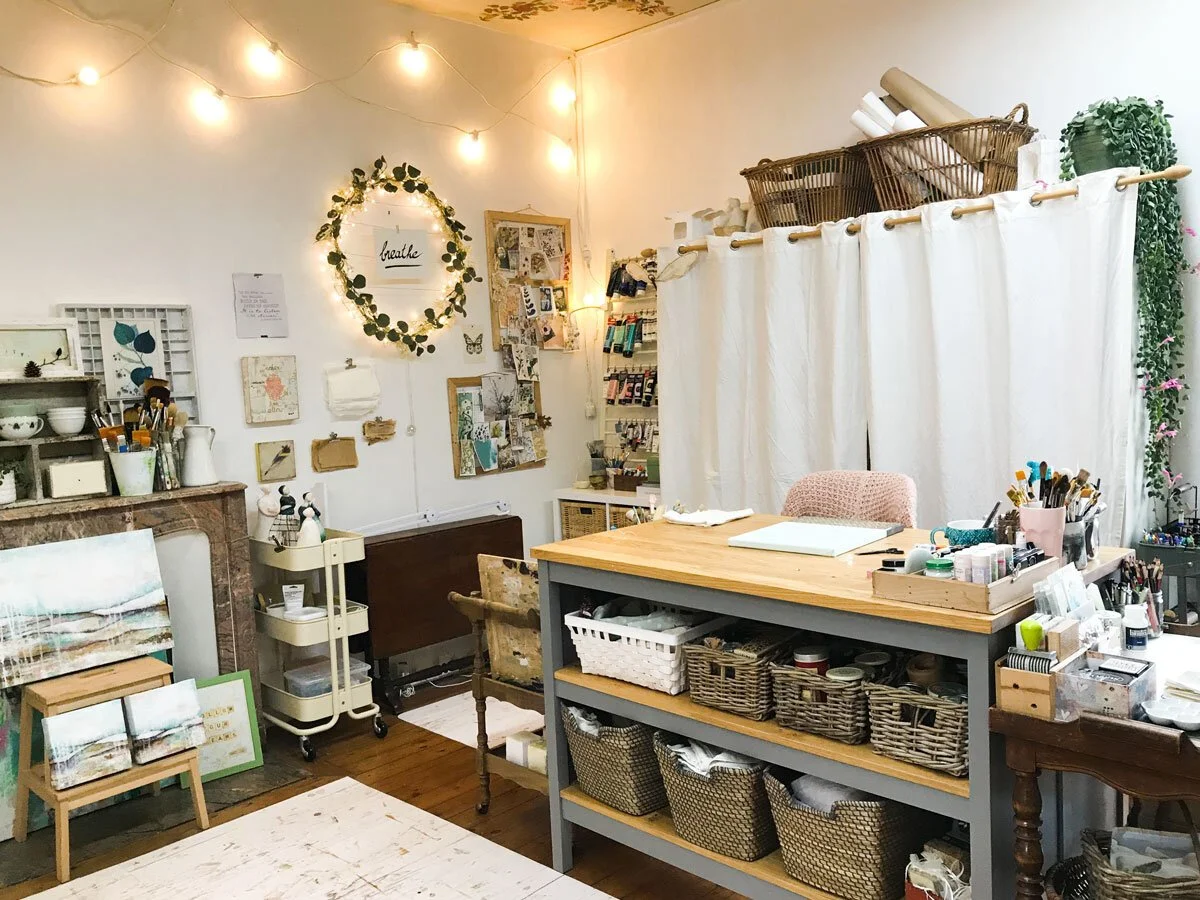
the art journaling corner
One of the best features of my new space, is that the first thing that greets me when I come in, is my art journaling table. Art journaling has become such an important part of my creative practice over the years, and I really felt the need to have a dedicated space just for it. A few weeks ago, I inherited my grandparents’ rolling cart, my grandpa’s old, paint-covered working stool and a few lovely other vintage things (read about it here). This is one of the little synchronicities that started a chain reaction and motivated me to rethink the whole space.

the art journaling corner
In a heartbeat, I knew that these cherished little pieces of furniture would be the perfect combination for an art journaling nook. I created it first, before I even considered reorganizing the rest of the room, and you can read all about it on the blog here (including my best tips for small art spaces!). The rolling cart is just big enough for my main, A4 journal, but even better for the smaller, A5 one that I have just started (pictured above). I love how cozy and inviting this small table feels. Plus this spot has the best natural light in the whole room!

i adore the paint-covered seat of this little stool!
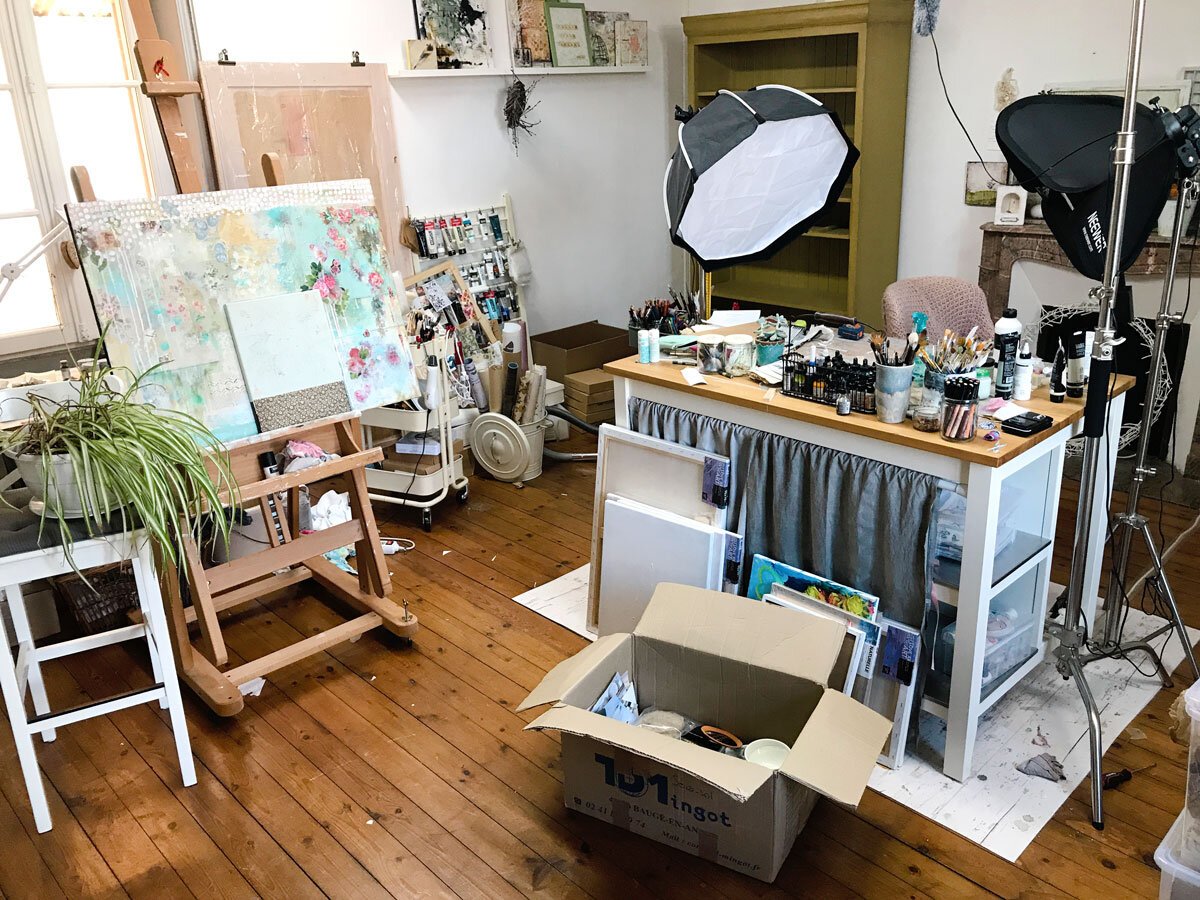
the main painting space
The biggest change though, is that I now have a dedicated area for filming my classes, and another area that’s just for making art: no more camera, light stands and wires getting in the way in the middle of the room... aaaahh... this feels like a soul-deep sigh of relief.
I got a second table delivered from Ikea, swiftly assembled by William and Arthur. I’m a big fan of these kitchen islands, which have open shelves and are the perfect height to work standing. I love that I have plenty of space to move around and paint standing in the middle of the room, and a cozier spot on the other side of the table, where I can sit on my comfy chair. I’ve also added curtains to my shelves (simply screwing some curtain rod holders to the top) and I love that it makes the whole room feel tidier and more airy. I already had the curtains and the rods, so it was great to find a new use for them!
The dusty corner
On the other side of the table is another, smaller rolling cart for my encaustic art supplies, and a folding table for all things plaster and paper clay. This is another important addition because these techniques can get messy and dusty real quick, which is not very compatible with the rest of my painting practice. Before, I would have to clean the table thoroughly in-between the different techniques, which felt frustrating because I love to have several projects going on at the same time. The new set up feels so freeing! Plus the folding table used to be my godmother’s, so it feels really special to me.

The “take a look back” spot
Another great feature is that I have a lot of empty space in the middle of the room. This is perfect for when I want to work on the floor (I do that a lot) and it gives me plenty of room to take a step back and look at a canvas from afar, which is one of the best ways to assess the composition.
Plus I’ve had fun making a pretty (but still useful) display on the mantel, and I know this will be a favorite spot to take pictures of my art!

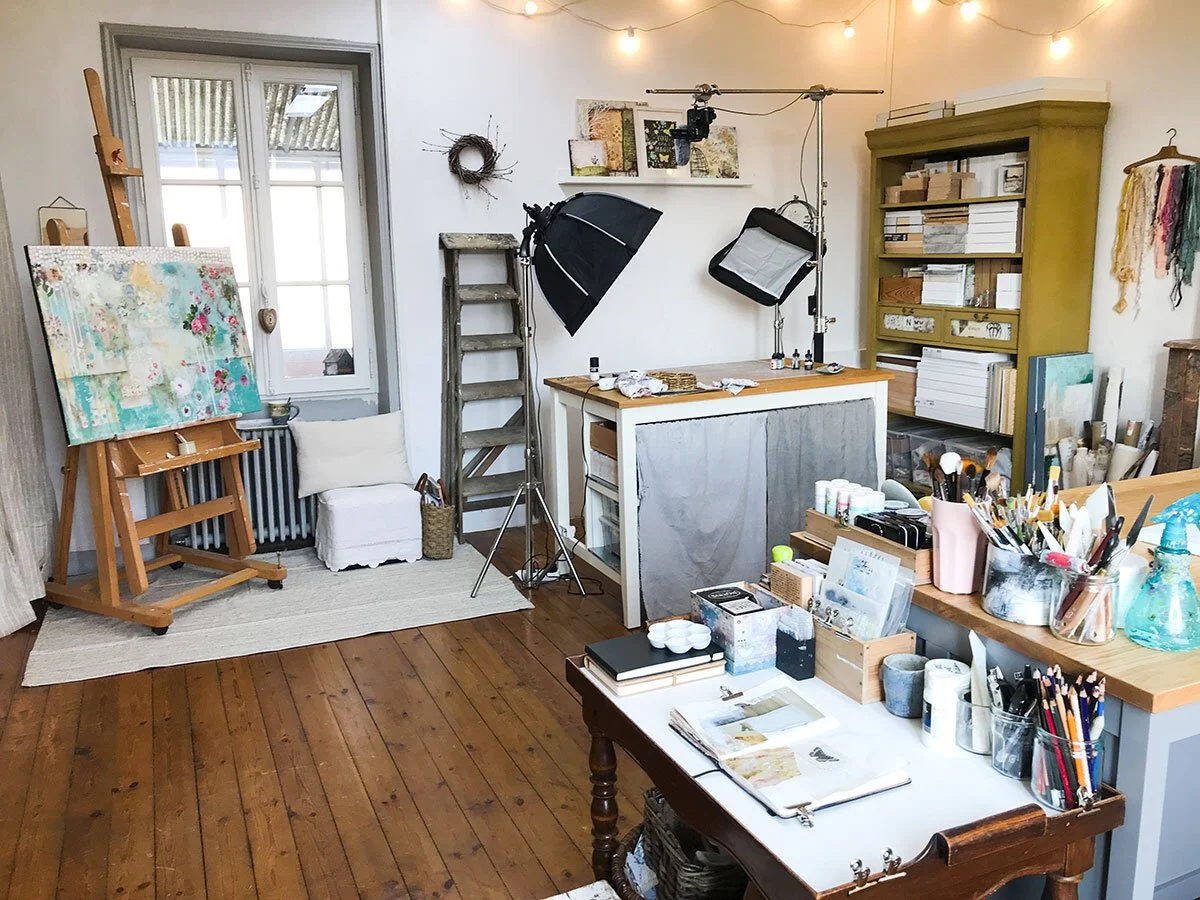
The filming area
On the other side of the room is my filming table. You have no idea what a difference it makes to have a dedicated space for the “teacher-me”, and the rest of the studio for the “artist-me”. So often they had been conflicting, creating tension and frustration. When I was filming a class, it would take over my table for weeks, depriving me of the just-for-me creative outlet I needed so much. Believe me, I resented that! I’ve come to realize that I really have two jobs, and now the studio reflects that, which makes a lot more sense and feels sooooo much better.

The “take a break” nook
If you’ve ever taken any of my online classes, you’ve probably heard me encourage you to… take a break! To me, this is very important when you create. So between the filming table and the easel, I have found just enough space for a small ottoman with plenty of cushions (I added tons more since I took this picture) and a basket full of books and magazines (lots of Where Women Create of course at the moment!). It’s warm and cozy next to the radiator, with a small tray to hold my cup of tea. And when I sit there, I have a direct view of the front garden through the opposite window. I have planted a lovely climbing rose there, and I can’t wait for it to grow and bloom!

Between the filming table and the reading nook, is my grandpa’s old ladder. At my grandparent’s summer house in Brittany, he would hang the large fishing net between two oak trees, and climb on this ladder to clean it and remove all the algae. That was quite a sight when we were kids! We were definitely not allowed to climb on that ladder back then, but now I am, and it’s just the right size to access the canvas storage behind the easel.

The easel
I’ve placed my easel where I can easily move it around (especially since it’s fully reclinable) and have good lighting. There’s a bit of natural light coming from the window (although it doesn’t look directly outside), there’s a daylight LED panel on the ceiling above it, and I can also turn the filming light around if needed. I’ve placed a cheap cotton rug underneath so I can have fun with drips and splatters, and not worry about it! At the moment I’m working on something floral, as I’m preparing my new class, “Flower Flow” (find out more here).
Behind it is a huge storage shelf for large canvases, fresh new ones and finished paintings alike. Linen curtains make it appear much lighter than it really is!

The office
This is where I’m sitting right now writing to you! Although William uses this space a lot more than me (but this week we’ve got builders putting up drywall in the living room, so I had to move…). This is where we edit all the videos for my classes: William does all the big edits, and I do the finishing touches. We’re a good team!

the “behind-the-door” bonus space
I like to make the most of the space (the studio is about 350 square feet), and this behind-the-door nook is no exception. I love this old pink door which used to be in our bathroom, it makes an awesome second easel! I have an idea of using it for some textile projects…
Then you’ve got to have bins of course: the large one for everything recyclable (paper, cardboard, plastic, masking tape, the packagings of art supplies…), the medium one for compostables (natural fibers, tissues, paper towels that have a bit of oil paint or encaustic wax, paper clay, smaller bits of cardboard, teabags…) and the smaller bin is for everything else. I have to say, this last one doesn’t fill fast, that’s why it’s so small!
Ever since I took this photo, I added a coat hanger to the wall on the right, so I’m free to work on the easel/door. The tote bag is my laundry bag for paint-covered rags. I hardly ever use disposables like paper towels, so this one does fill fast. And then of course are my painting aprons: I love to have them at the ready as soon as I walk in. They feel like an invitation to step into my artist-self and get messy!

take the tour on video!
So that’s it for this first part of the studio tour! To take a quick look on video, head over to my IGTV (Instagram) here:
If you have any questions about these different working stations or anything else in the studio, please post them in a comment below. I will be happy to answer you!
And stay tuned because in my next post I will tell you all about the different storage solutions I’m using for my art supplies, and how they support my creative practice. If you have any questions about that, especially if you know that something is not working in your own space, please tell me in a comment and I will do my best to address it next week!
Please let me know in a comment below!
I wish you a beautiful, inspired day, and many joyful hours of creativity.